3 Learn About AI Assignment
Using Web 2.0 Tools and Generative AI (200 points)

What are Web 2.0 Tools?
Web 2.0 refers to the second generation of the Web, which enables people with no specialized technical knowledge to create their own websites, to self-publish, create and upload audio and video files, share photos and information and complete a variety of other tasks. They are internet tools that allow the user to go beyond just receiving information through the web. The user is expected to interact and create content to share with others.
The term “Web 2.0” is commonly associated with web applications that facilitate interactive information sharing, interoperability, user-centered design, and collaboration on the World Wide Web. Examples of Web 2.0 include web-based communities, hosted services, web applications, social-networking sites, video-sharing sites, wikis, blogs, mashups, and folksonomies. (Wikipedia, 2010)
Web 2.0 is defined as an online application that uses the World Wide Web (www) as a platform and allows for participatory involvement, collaboration, and interactions among users. Web 2.0 is also characterized by the creation and sharing of intellectual and social resources by end users. (Metiri Group, 2009)
What is Generative AI?
Generative AI is a type of artificial intelligence technology that can create various types of content, including text, imagery, audio, and visual data. Neither artificial intelligence nor generative artificial intelligence are new. Generative artificial intelligence was first utilized in the 1960s with chatbots. (This first Chatbot was named Eliza.)
However, generative AI has just become publicly available to the degree that we are currently seeing since late November 2022.
Various platforms such as MagicSchool.ai and Goblin.Tools have become popular in educational circles, although ChatGPT currently remains the most popular platform (as of November 2023).
How are we using AI and Web 2.0 tools together?
Great question. In this course, you are going to create 200 points worth of Web 2.0 tools on your authentic topic that you may choose to share with your students.
However, rather than just use the Web 2.0 tool, you are going to use Generative AI through ChatGPT to come up with an idea of how to use a particular tool.
What exactly would that look like?
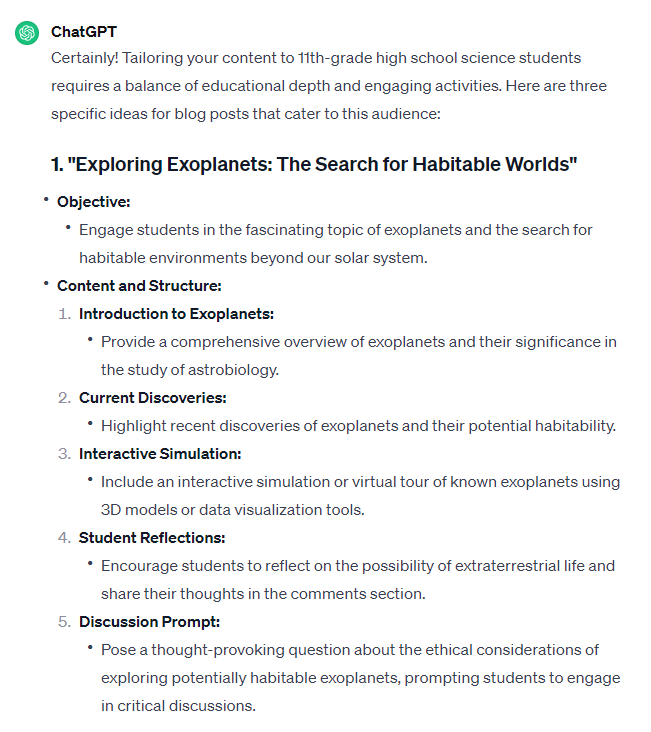
For example, let’s say my authentic topic is the Solar System. I would first decide to use Blogger from the Web 2.0 list below. I would use ChatGPT (https://chat.openai.com) to generate ideas.
I just entered this prompt into ChatGPT.

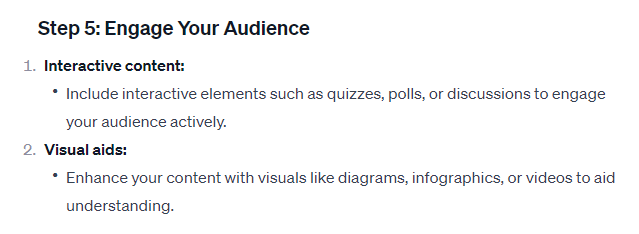
ChatGPT gave me several ideas, which may in fact be more than I need to do, so I can ask follow-up questions to dig a little deeper. For instance, ChatGPT gave me this response for Step 5.
I will now ask ChatGPT the following.

ChatGPT gave me several more options, listed below.
Further questions can be asked until I have landed upon exactly what I think could be a great idea.
Do I have to do exactly what the Generative AI tells me to do?
Absolutely not! Generative AI cannot currently reproduce a teacher, and we are not sure that it will ever be able to. However, Generative AI absolutely has the ability to help teachers, and that is what we are going to explore in this course.
In other words, your teacher skills are still very much needed. We want you to use Generative AI to help you be more efficient and perhaps even creative. As such, you are always welcome to do what you feel would be best for you in your role as educator.
Creative Web 2.0 Projects
Students may select any projects from the Web 2.0 tools described below. Your possible project point values must at least add up to the required 200 points. Yes, you CAN earn extra credit for more than 200 points. Note the following requirements:
Your projects must be completed on your approved authentic (or real world) topic for the course. These are projects that YOU complete, not your K-12 pupils. The projects must be about your authentic topic, not how-to-create a project, not directions for the pupils’ project, and not a guide/template for pupils. You are creating model projects about the authentic topic like you would want your pupils to create.
The table below lists many project ideas. You may select a project from this list or submit a project proposal of your own to the instructor. Many of the projects below may have other Web 2.0 tools that may be used. You may ask for approval for other Web 2.0 tools in a project category. This is only a suggested list. HOWEVER, if it is not on this list, please reach out to your professor before proceeding. You’ll very likely get permission, but we want to make sure.
You may complete only one project in a category, e.g., you may not complete two projects in the Social Bookmarking or two Book Publishing projects. The student is responsible for purchasing any service necessary to complete a chosen project or downloading it yourself from the Internet. Some publishers will allow temporary or trial downloads of programs or services. Please note: You are not expected to purchase any software. There are free options anywhere, but if you choose to purchase one, that is at your discretion.
What to Submit with EACH Project You Complete:
Web 2.0 Project Description Form
Format of project:
If your project is saved online, provide link to your project in the Web 2.0 Project Description Form.
If your project was created online but you could not save it to your computer and it is not saved online, take several screenshots showing all parts of your project. Paste them at the bottom of the Web 2.0 Project Description Form. (Click here for directions to take a screenshot on a PC. Click here for directions to take a screenshot on a Mac.)
If you saved the project on your computer, upload the file(s) under Assignments in BlackBoard with the Web 2.0 Project Description Form. If your project is more than one file, zip the folder containing the project and upload that file to BlackBoard along with the Web 2.0 Project Description Form. (Click here for directions to zip a folder on a PC. Click here for directions to zip a folder on a Mac.)
Please name files with your last name, Web 2.0 tool, and the topic. Name files like this: Lastname.Web tool. Project-name. A project title example is “Logsdon.Animoto.Lewis and Clark”. When you zip the entire folder containing your project, name it the same way.
Web 2.0 Project Description Forms and projects are submitted under “Submit Assignments Here” in Blackboard.
Scoring of Projects:
Under “Submit Assignments Here” six places are set up for you to submit projects. Because BlackBoard requires the instructor to assign points for each assignment, each was assigned 100 points. This does NOT mean that each of your projects are worth 100 points. If you submit a project worth 75 points (from the chart below) and you earn 72 out those 75 points, BlackBoard will show 72/100 points. However, it is really 72 out of 75 points (not 100). If you submit a 50-point project and earn 42 points, BlackBoard will show 42 out of 100 but it is really 42 out of 50 points.
Click here to review the scoring rubric for all projects before you begin. The rubric is rather generic since there are so many different types of projects from which to choose.
|
No. |
Point Value |
Your Project |
Project Category |
Web 2.0 Tool |
Web 2.0 Tool Description |
|
|
Propose your own project. Email your project idea to your professor and point value you think it is worth.
|
||||
|
|
75 |
Your Project: Create at least a 3-page blog website; Home page with 2 or more higher level thinking Blog posts about your topic; About page with info about you; Resources page with links to info about your topic; pictures/graphics on each page
|
Social Collaboration |
Blogs: WordPress.com
|
WordPress is an open source blog publishing application which includes widgets and easy to use themes. WordPress also features integrated link management; a search engine-friendly, clean permalink structure; the ability to assign nested, multiple categories to articles; and support for tagging of posts and articles. |
|
Powered by Google, Blogger to give you an easy way to share your thoughts. Features include easy interface, themes, use of Picassa web albums and more. |
|||||
|
MediaWiki is the most popular wiki software on the net. It is used to run Wikipedia. |
|||||
|
Wikis are simple web pages that groups, friends, and families can edit together. Start your wiki at Wikispaces is fast, free, and easy. |
|||||
|
|
75 |
Your Project: Create a survey with at least 5-10 questions on your topic; have at least 15 or more students and/or educator colleagues respond to your survey, collect and use the tools on the site to create reports about survey results; What to submit: link to the survey; screenshot(s) of survey results; report of analysis of results |
Survey Tools |
Or
|
These sites allow you to create polls and questionnaires online to help you ask questions, collect responses, and analyze results. |
|
No. |
Point Value |
Your Project |
Project Category |
Web 2.0 Tool |
Web 2.0 Tool Description |
||||
|
|
75 |
Your Project: Create a 3 minute interactive video with at least 4 questions or activities within the video |
Interactive Video |
Playposit is an online learning environment to create and share interactive video lessons. Teachers begin with any online video (screencasts, Khan Academy, TED, etc.) and transform what is traditionally passive content into an active experience for students, with time-embedded activities. Be warned – Playposit has become more expensive in recent months. |
|||||
|
This tool works the same as Playposit but it has badges that teachers can earn. EdPuzzle has a lot of interactivity that can be used for assessment, discussion, and more.
|
|||||||||
|
|
50 |
Your Project: Create an online presentation with at least 15 slides; use 3 or more features of the site; What to submit: link to online presentation or the presentation file if you saved it on your computer |
Presentation |
|
Prezi: Create online presentations live on the web. Zoom and Spin presentation tool- Very Cool! |
||||
|
ThingLink is the leading platform for creating interactive images and videos for web, social, advertising, and educational channels. |
|||||||||
|
Emaze is the next generation of online presentation software. Select any presentation template to easily create a visual experience for your audience. Emaze features a proprietary state of the art HTML5 presentation maker that will create the slideshows, video presentations and even 3D presentations. |
|||||||||
|
Create beautiful presentations with them templates, beautiful and easy to plug in your own content; not too easy to customize. This platform has the benefit of having Generative AI already incorporated into it! |
|||||||||
|
Great app for creating presentations. |
|||||||||
|
Pear Deck Addon for Google Slides |
Create interactive presentations. This is an Addon for Google Slides. So, you create the presentation in Google slides and add the interaction with Peardeck. (Do not just create a plain Google Slides presentation. This will not count in this class.) |
||||||||
|
|
50 |
Your Project: Create an original, creative informative project on your authentic topic that includes several forms of multimedia. |
Infographics |
Pictochart or
|
Make Your Own Infographics; Making Information Beautiful Has Never Been Easier |
||||
|
Visualize your resume in one click; Create your infographic resume for free |
|||||||||
|
Create and share visual ideas. There are many templates to choose from. |
|||||||||
|
Make your data dance! Infogram’s interactive visualizations add a new dimension of engagement. Responsiveness guarantees the experience for a wide audience. |
|||||||||
|
|
50 |
Your Project: Create a timeline on your topic with 20 or more items, include pictures and multimedia |
Timelines |
Sutori is self-described as a collaborative tool for platforms. I find it is best described as a vertical, interactive timeline. |
|||||
|
|
Capture your memories, tell your stories, travel through time. Combine your videos, photos, blogs, and mp3s into rich, multimedia storylines. Preferred for multimedia content |
||||||||
|
|
50 |
Your Project: Create an original mindmap with 20 or more items on your topic; be sure to use multimedia like video, audio, images, etc. |
Mindmapping |
|
The Visual Way To Get Your Things Done! See your actions in context, and prioritize the things that really matter.
|
||||
|
|
You can: Create colorful mind maps online, share and work with friends, embed your mind map in your blog or website, email and print your mind map, save your mind map as an image
|
||||||||
|
Real-time Brainstorming: Simultaneously work on maps with friends and colleagues and see changes as they happen. |
|||||||||
|
|
75 |
Your Project: Create and publish your own original book or story on your authentic topic, include pictures or illustrations |
Book Publishing |
|
Makes book creation easy and fun, it also allows groups of people to build books together.
|
||||
|
|
Allows authors to publish their work themselves for free with complete editorial and copyright control.
|
||||||||
|
|
Storybirds are short, visual stories that you make with family and friends to share and (soon) print.
|
||||||||
|
|
Book Creator is a simple tool for creating awesome digital books. Create your own teaching resources or have your students take the reins.
|
||||||||
|
|
75 |
Your Project: Create your own original digital story on your authentic topic with 10 or more pictures and at least one short video, must be 3-5 minutes |
Digital Storytelling |
Animoto – *educators can get a free account; click on Education link at the bottom of the home page OR Use Windows Movie Maker or iMovie |
Automatically produces beautifully orchestrated, completely unique video pieces from your photos, video clips and music. Fast, free and shockingly easy. |
||||
|
|
75 |
Your Project: Create an original 3-5 minute animated movie on your topic |
Animation |
|
Animated presentation tools that supercharges your presentations and videos! Save massive amounts of time and money by creating Presentoons that bring the WOW!-factor to product demos, business presentations, social media clips, and much more. |
||||
|
|
25 |
Your Project: Create or edit at least 10 pictures (3 must be on your topic) using at least 2 of the sites in this category (or propose a site of your own for photo editing), put all editing information along with site link, before and after pictures in a Word document to submit to your instructor |
Image Editing |
|
Allows users to create, share, remix, explore, comment, rate and fave the artwork of its members. |
||||
|
Makes your photos fabulous with easy to use yet powerful editing tools. Tweak to your heart’s content, then get creative with oodles of effects, fonts, shapes, and frames. |
|||||||||
|
PhotoFunia is an online photo editing tool that gives you a fun filled experience. You upload any photo and just wait to see the magic. Our proprietary technology automatically identifies the face in the photo and let’s you add cool photo effects and create funny face photo montages. |
|||||||||
|
|
75 |
Your Project: Create an original screencast with one of the following purposes: demonstrate how to use some technology whether an online Web 2.0 tool or software on your computer demonstrate or discuss something on your topic (for example, if your topic is endangered animals, you could show websites about endangered white lions and bring up the pupils’ assignment on your blog or Word file and discuss their assignment. Do not just do a screencast showing a video. If your video is longer than 3 minutes, then break it up and create a series of videos. Students will not watch a long video. |
Screencast |
|
Allows you to record all screen and audio activity on your computer and create industry-standard AVI video files and using its built-in SWF Producer can turn those AVIs into lean, mean, bandwidth-friendly Streaming Flash videos |
||||
|
Free and easy way to make a video recording of your screen (aka screencast) and upload it for free hosting all from your browser with no install. |
|||||||||
|
|
50 |
Your Project: Use 2 of these 4 tools to create visual data on your topic |
Visualization Tools/Data Analysis/ Graphing Tools |
Transform a spreadsheet or database into interactive visualizations with our award winning StatPlanet software |
|||||
|
TouchGraph’s powerful visualization solutions reveal relationships between people, organizations, and ideas. Explore the wealth of information in today’s growing data collections with our intuitive visual interfaces. |
|||||||||
|
The Trendalyzer is a web-service displaying time series motion charts of developmental statistics for all countries and many sub-national regions. |
|||||||||
|
Create stunning charts online. Visualize financial, scientific or other type of data. |
|||||||||
|
Creately (Create diagrams) Create your own Venn diagrams online using Venn diagram templates and plenty of other tools to add styling and clarity to your Venn diagrams. It’s a complete diagramming tool to help you visualize your ideas. |
|||||||||
|
|
50
|
See specifics of the platform requirements to the right. |
Social Media |
Create a FaceBook like page of a fictional or historical character. Click here to review samples at the FakeBook Gallery and click here to get FakeBook Help. |
|||||
|
Create a 1 to 2 minute video incorporating innovative features within the TikTok app on your authentic topic. Be sure to include the elements that will make your TikTok video fun to watch. It will definitely help if you looked up other TikTok videos on your authentic topic! |
|||||||||
|
|
25 |
Your Project: Create an interactive educational game on your topic |
Game Tools |
Classtools.net allows you to create free educational games, activities and diagrams in a Flash! Host them on your own blog, website or intranet! No signup, no passwords, no charge! |
|||||
|
PurposeGames.com is host to educational quiz and trivia games created by its members. In just a few minutes, you can create your very own game to share with your friends! |
|||||||||
|
What2Learn – the home of superpowered revision and learning. The fun and effective way to learn. Play some of our thousands of revision games and quizzes or make your own. |
|||||||||
|
JeopardyLabs allows you to create a customized jeopardy template without PowerPoint. The games you make can be played online from anywhere in the world. |
|||||||||
|
ProProfs Brain Games allows you to build interactive crossword puzzles, jigsaw puzzles, word searches, hangman games, and sliding puzzle games. The games you create can be embedded into your blog or shared via email, Twitter, Facebook, or Myspace. |
|||||||||
|
Create exciting online game for the whole class or teams using your own content.
|
|||||||||
|
|
Create your own “trading card” with any content, use predesigned template or design your own categories.
|
||||||||
|
16. |
25 |
Your Project: Create projects for all four tools on your authentic topic: 3 for Fodey, 1 for Blabberize, and 3 for Draw on the Net, 5 QR codes for resources on your topic |
Just for Fun |
Fodey is a free web tool that allows the user to input text into a form and convert it into a variety of formats such as newspaper clippings, wizard text, and talking owls. |
|||||
|
|
Make any picture talk! |
||||||||
|
Drawonthe.net is an easy way to draw together with others online. It allows you to draw on top of any internet image or website. |
|||||||||
This is a general scoring rubric used for all projects. Some aspects of the rubric may not address all projects; however, as stated earlier it is a general guide to scoring the multimedia projects.
|
Scoring Rubric for Multimedia Projects: |
1 = Needs Much Improvement |
2 = Needs Some Improvement |
3 = Good or Acceptable |
4 = Excellent |
|
Creativity |
Product; Art/photos, color, and space not original and does not carry theme/tone/ concept; Unprofessional look; Overall graphical theme does not appeal to the audience, compliment the information, and not based upon logical conclusions and sound research. |
Some original, unique features in product; Art/photos, color, and space not original and does not carry theme/tone/concept; Unprofessional look; Overall graphical theme does not appeal to the audience, compliment the information, and not based upon logical conclusions and sound research. |
Original, unique product; Art/photos, color, and space used in original ways that mostly carry theme/tone/concept; Professional look with an overall graphical theme that mostly appeals to the audience, compliments the information, and based upon logical conclusions and sound research. |
Excellent, original, unique product; Art/photos, color, and space used in original ways that carry theme/tone/concept; Professional look with an overall graphical theme that appeals to the audience, compliments the information, and based upon logical conclusions and sound research. |
|
Product (depth, accuracy, design, organization) |
Product is inaccurate, missing components, or unorganized; Many grammar/ spelling errors |
Product is not accurate, in-depth, neat, or organized; Many grammar/ spelling errors |
Adequate product is accurate, in-depth, neat, organized; Few grammar/spelling errors |
Accurate, in-depth, neat, organized product and information; No grammar/spelling errors |
|
Use of technology |
Many technical problems; inconsistent navigation and formatting; No graphics from outside sources; No use of advanced features/ enhancements such as video, transitions, sounds, and/or animations (appropriate to software/project) |
Some technical problems; inconsistent navigation and formatting; 2 or less graphics from outside sources; Use of one advanced feature/ enhancement such as video, transitions, sounds, and/or animations (appropriate to software/project) |
Few technical problems; consistent navigation and formatting; 5 or less graphics from outside sources; Use of some advanced features/ enhancements such as video, transitions, sounds, and/or animations (appropriate to software/project) |
No technical problems; consistent navigation and formatting; Excellent use of graphics; Use of several advanced features/enhancements such as video, transitions, sounds, and/or animations (appropriate to Web 2.0 tools) Your instructor can view it the first time. |
|
Topic/ Content |
Includes little essential information and one or two facts. Product is Revised Bloom’s level 1 or 2 |
Includes some essential information with few citations and few facts. Product is Revised Bloom’s level 2 or 3 |
Includes essential information with most sources properly cited in APA format. Information is mostly clear, appropriate, correct, and suited to the specified purpose and audience; Encourages some readers to know more. Product is Revised Bloom’s level 4-Analysis or higher |
Covers authentic topic completely and in depth; Information is clear, appropriate, correct, and suited to the specified purpose and audience; Encourages readers to know more; Sources cited in proper APA format. Product is Revised Bloom’s level 4-Analyze or higher; Accomplished all of the above on the first attempt |
How To Zip a file or folder (on Windows PC computer)
Select the file or folder you want to compress.
Right click and choose Send To
Slide Right and choose Compressed (zipped) folder
Allow the file or folder to compress.
You should now see an icon with the same name plus a Zip. It may even have a zipper on the folder.
This is the compressed file that you may put on the server or send via email.
How To Zip a file or folder (on Macintosh computer)
To create a compressed file, Right-click on the file (or folder) and choose Create Archive (which is Apple-speak for “make a compressed ZIP file”).
How to take a screenshot on a Windows PC computer
Press the Print Screen key on your keyboard. It may be labeled [PrtScn].
The image is on your clipboard (or temporary memory). You can do one of two things:
Paste the image into another document such as Word ( the image may be too large and you will need to resize it.)
You can paste the image into an editing program and adjust it and save it. Be sure to save it as a jpg file.
Open an image editing program, such as Microsoft Paint.
Go to the Edit menu and choose Paste.
If prompted to enlarge the image, choose Yes.
Optional: Use your image editor’s crop tool to crop out unnecessary portions of the screen shot.
Go to the File Menu and choose Save As.
Navigate to the folder where you want to save the image.
Type a file name for the image and save as jpg.
How to take a screenshot on a Macintosh computer
Hold down the APPLE [Command] and SHIFT keys
Press 3 for a screen shot of the entire screen
Press 4 to get a “Crosshairs” so you can select just a section of the screen you want a screenshot for!
Press the space bar after you press 4 if you want it to automatically size the screenshot so that it perfectly matches the window it’s over. After you press the space bar, a camera icon should come up.
Know that the resulting file will be placed on your desktop, named Picture X.pdf for versions of 10.3 or earlier and Picture X.png for 10.4 and later (could also end in .jpg).
